SSL Traffic Decryption

We recently had a need to inspect the contents of an HTTPS (SSL/TLS) connection. As we had never had the opportunity to set things up to facilitate decryption of SSL/TLS connection we had to do a little bit of research.

The way we approached this was by running the software that establishes the HTTPS connection we need to decrypt on a VirtualBox Virtual Machine (VM), and then running a Man-in-the-Middle (MitM) proxy on the VM host, which runs Ubuntu 15.04. The MitM proxy that we used was mitmproxy. No reason in particular for choosing mitmproxy other than it was the first solution that we tried, it was very well documented, and it worked on first try. We are very impressed with this little piece of software — its design is well thought, and the text-based user interface is very powerful.

This post documents the steps involved in setting things up for decryption of SSL sessions.

General

There are several possible network topologies to use. The one that we chose was one where the client machine and the proxy machine are on the same physical network. Because we are using VirtualBox, where the Virtual Machine is the client machine and the Virtual Machine host is a physical machine, we configured the network settings of the (client) Virtual Machine to use bridged networking. This is equivalent to having two different machines on the same physical network segment.

Note: Our proxy machine (not a Virtual Machine) only had a wi-fi network interface so the Virtual Machine, through bridged networking, was using this wi-fi network interface to reach the network.

Set Up Of Proxy Machine

Installation

Nothing much to do here, really, as there is an Ubuntu binary package for mitmproxy, so installation boils down to a simple “apt-get install mitmproxy”.

VirtualBox Settings

The network interface of the virtual machine must be configured in bridged mode. The VM host machine only needs one interface (for example, the wireless NIC “wlan0”). That interface will be used for both the VM host and the actual VM to have network connectivity. Make sure the VM NIC is configured to use the VM host NIC as the bridge interface.

Also, VirtualBox must be configured to allow promiscuous mode on the bridge interface. This is configured in the “Advanced” section of the network adapter properties (where the interface mode [bridged, NAT, etc.] is configured). “Allow VMs” for the “Promiscuous Mode” setting is appropriate.

Configuration

After installing the mitmproxy software, the following things must be done:

  • Enable IP forwarding, which is normally disabled by default:
shell$ sudo sh -c 'echo 1 > /proc/sys/net/ipv4/ip_forward'
  • Disable ICMP redirects:
shell$ sudo sh -c 'echo 0 > /proc/sys/net/ipv4/conf/all/send_redirects'
shell$ sudo sh -c 'echo 0 > /proc/sys/net/ipv4/conf/wlan0/send_redirects'
  • Add iptables rules to redirect traffic going to destination TCP port 443 to port 8080, which is where mitmproxy is listening on:
shell$ sudo iptables -t nat -A PREROUTING -i wlan0 -p tcp --dport 80 -j REDIRECT --to-port 8080
shell$ sudo iptables -t nat -A PREROUTING -i wlan0 -p tcp --dport 443 -j REDIRECT --to-port 8080
  • Run mitmproxy:
shell$ mitmproxy -T --host

Setup Of Client Machine

The following things need to be configured on the client machine:

  • Configure the machine running mitmproxy (the proxy machine) as the default gateway. This will cause all SSL/TLS traffic going towards the server to be sent through the proxy machine, assuming that the server is on a different (remote) subnet.
  • Install the Certificate Authority certificate that the proxy machine will present to the client when the client establishes SSL/TLS sessions. mitmproxy really shines in this area, making the certificate installation a very seamless process. We will not repeat here the excellent documentation on how to do this. Instead, we will point readers to the documentation: http://mitmproxy.org/doc/certinstall.html.
  • The default gateway of the client machine must obviously be the proxy machine. The easiest way to accomplish this is by configuring manually the TCP/IP settings of the client machine. If DHCP is used for IP configuration then the default gateway will be whatever the DHCP sends, which might be different from the IP address of the proxy machine. In that case the client machine can be forced to use the proxy machine as its default gateway by adding a new default route using a lower metric, for example: ip route add default via <IP address of proxy machine> metric 50.

Decrypting The SSL/TLS Session

Once the machine running the mitmproxy software (the “proxy” machine) and the machine running the SSL/TLS client (the “client” machine) are configured, we are ready to establish the SSL/TLS sessions that we want to decrypt — just open your browser and go to the https:// URL you are interested in examining, launch your SSL VPN client, etc.

The proxy machine will intercept the connection and do what it does well, i.e. pretend to the server to be the client, and pretend to the client to be the server, while decrypting traffic going in both directions.

mitmproxy provides a fantastic text-based user interface that allows the user to easily navigate through each SSL/TLS request and response going through the proxy.

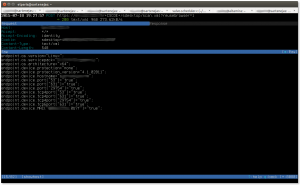
The following screenshot (click on image for larger version) shows the main mitmproxy window, which lists all the captured flows:

mitmproxy1

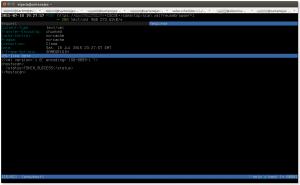
The following screenshot (click on image for larger version) shows a particular flow, especifically the request part of the flow:

mitmproxy2

And finally, this screenshot (click on image for larger version) shows the server’s response to the previous request:

mitmproxy3

And that is it; there really isn’t anything to it. It took longer to read the mitmproxy documentation than to set things up and run the SSL/TLS session.

Final Thoughts

From the main mitmproxy window, all flows can be saved to a file for later analysis by pressing the ‘w’ (write) key, which will prompt if all flows must be saved or just the one at the cursor, and the name of the file to save the flows to.

Flows can be loaded later by running mitmproxy with the -r (read) switch.

 Caveats

Be aware of mitmproxy bug 659 (https://github.com/mitmproxy/mitmproxy/issues/659). This bug causes HTTP HEAD requests to return a Content-Length equal to zero instead of the correct value. This will cause some applications to fail as they will think there is nothing to download. This trip me up pretty good until I found the previously mentioned bug and I applied the fix that was committed to resolve the bug.

 

FreeRADIUS: Active Directory authentication and group check via winbind + rlm_unix, not LDAP

[This blog post is based on an email that I sent to the freeradius-users mailing list in September 2014.]

I have a pretty common requirement: authenticate wireless users against Active Directory and prevent SSID cross-connections, i.e. users in Active Directory group A can only connect to SSID A and users in Active Directory group B can only connect to SSID B.

I have seen plenty of messages in the freeradius-users mailing list archives about how to accomplish this. The authentication part is easy and has excellent documentation, e.g.

http://deployingradius.com/documents/configuration/active_directory.html

The group checking part is also well understood and documented (rlm_ldap), and whoever asks apparently gets told to use LDAP. At least I could not find anything on the alternate approach described here.

I decided to look into a different approach, which does not involve LDAP — because the machine already has winbind running (for ntlm_auth), why not to use the Name Service Switch and rlm_unix to check for group membership and avoid usind LDAP altogether? Group membership information is already available if one has added “winbind” to “passwd” and “group” in /etc/nsswitch.conf.

I apparently got this to work and wanted to share the solution in case someone finds it useful:

First, I configured winbind for ntlm_auth use by FreeRADIUS, as explained elsewhere. Then, I verified that the system can see Active Directory users and groups as if they were Unix users and groups:

shell$ id DOMAIN\\username
uid=10017(DOMAIN\username) gid=10002(DOMAIN\domain users) groups=10002(DOMAIN\domain users),10024(DOMAIN\computerlab-monitoring),10008(DOMAIN\domain admins),10034(DOMAIN\vdi teachers),10010(DOMAIN\teachers),10026(DOMAIN\vdi users),10011(DOMAIN\teacher assistants),10074(DOMAIN\schema admins)

Then, I put this logic, which is similar to what one would normally use if LDAP and Ldap-Groups were in use, in the post-authentication section of my sites-enabled/default:

if (NAS-Port-Type == Wireless-802.11) {
  if (Called-Station-Id =~ /.*:SSID-A/i) {
    # Can't do 'if (Group != "xxxxx")' because !=
    # operator doesn't work for group checking. Careful
    # with the number of backslashes.
    if (!(Group == "DOMAIN\\\\group A") ) {
      update reply {
        Reply-Message = "User not allowed to join this wireless network"
      }
      reject
    }
  }
  elsif (Called-Station-Id =~ /.*:SSID-B/i) {
    if (!(Group == "DOMAIN\\\\group B") ) {
      update reply {
        Reply-Message = "User not allowed to join this wireless network"
      }
      reject
    }
  }
}

This works if the EAP identity is “DOMAIN\username”. However, I did not want to make things unnecessarily complicated for my users and wanted them to be able to enter just “username” when they configure their devices.

The main issue to address, however, is that if the identity is entered as “username” (not “DOMAIN\username”), the group check will fail because the Unix user ID for users that are known to the system via winbind is “DOMAIN\username”, not “username” (see output from the “id” command above).

“Not a problem”, I thought, “I’ll just manipulate User-Name before anything happens and prefix it with “DOMAIN\”. Turns out that was a bad idea because that made User-Name different than the EAP identity hidden in the EAP message, which caused the “rlm_eap: identity does not match User-Name, setting from EAP identity” message that has bitten so many people before.

The solution I came up with was to still manipulate the User-Name but towards the end, in the post-auth section, instead of at the beginning.  This way EAP uses the right identity, but the rlm_unix Group check uses the correct “DOMAIN\username” User-Name.

The final configuration looks like this:

if (NAS-Port-Type == Wireless-802.11) {
  # If User-Name doesn't contain our domain then add it.
  # It's needed for the Group check to use the correct
  # username.
  if (User-Name !~ /DOMAIN\\\\/i) {
    update request {
      User-Name := "DOMAIN\\\\\\\\%{User-Name}"
    }
  }

  if (Called-Station-Id =~ /.*:SSID-A/i) {
    # Can't do 'if (Group != "xxxxx")' because !=
    # operator doesn't work for group checking. Careful
    # with the number of backslashes.
    if (!(Group == "DOMAIN\\\\group A") ) {
      update reply {
        Reply-Message = "User not allowed to join this wireless network"
      }
      reject
    }
  }
  elsif (Called-Station-Id =~ /.*:SSID-B/i) {
    if (!(Group == "DOMAIN\\\\group B") ) {
      update reply {
        Reply-Message = "User not allowed to join this wireless network"
      }
      reject
    }
  }
}

I do not know about the performance impact but this should not require additional network traffic to check for group membership because winbind caches this information.

Another possible advantage is redundancy: Using winbindd (I theorize, I am not sure about this) provides redundancy because the group membership comes from the domain controller, which is found using DNS lookups — if a controller goes down then another (hopefully) takes its place and winbindd will be able to find it with no configuration changes.

This approach seemed simple to me — no additional configuration other than manipulating the User-Name in the post-authentication phase.

Things can also be made to work if the user chooses to configure the supplicant with “DOMAIN\user” as the identity — in this case one needs to configure “with_ntdomain_hack = yes” in modules/mschap, create an empty “DOMAIN” realm in proxy.conf, and enable the ntdomain realm in the authorize section of sites-enabled/inner-tunnel. Doing this will allow both “DOMAIN\user” and just “user” to work.

I have this being used in production on a small network (less than 50 users) and have not encountered any show stoppers yet. If you read the freeradius-users thread referenced at the top of this post you will notice that modifying User-Name is discouraged. I was told to use Stripped-User-Name instead but I never had a chance to go back and look into it.  Caveat emptor.

Update May 22, 20016: I had to set up another Linux server for winbindd. I ran into a couple of minor problems that took me some time to troubleshoot and fix. First, it seems like the Ubuntu 14.04 upstart script configures the wrong winbindd privileged directory — instead of /var/lib/samba/winbindd_privileged/ it configures /var/run/samba/winbindd_privileged/. The fix is to edit the upstart job configuration file (/etc/init/winbind.conf) and change it to use the correct directory path. Second, “wbinfo -a user%password” will not work when testing things (as suggested at the deployingradius.com page above) unless the user running wbinfo is a member of the group “winbindd_priv”. And third, running “radtest -t mschap paris mG2eudPas 127.0.0.1:18120 0 testing123”, also suggested at the deployingradius.com page above, will not work unless the user the FreeRADIUS daemon run as is a member of the group “winbindd_priv” — this is also required for correct FreeRADIUS operation. So, it is minor issues but they can be a hassle to troubleshoot.

Cisco ASA, “show service-policy”, and SNMP

Recently, a co-worker asked if it is possible to obtain the counters shown in the output from the command “show service-policy” on a Cisco ASA. I did not know the answer so I had to do a little bit of digging…

The list of MIBs supported by the Cisco ASA is documented here.

Based on a quick reading of that document, it seemed like CISCO-UNIFIED-FIREWALL-MIB could have provided this information, *if* it had been completely implemented. However, there is a documented caveat for CISCO-UNIFIED-FIREWALL-MIB at the above page:

“Limited support for objects under cuFwConnectionGrp and cuFwUrlFilterGrp.”

And an snmpwalk confirmed that the information is not there:

paris@bethlehem[1]:~$ snmpwalk -m CISCO-UNIFIED-FIREWALL-MIB -Os -v2c -c ****** 1.2.3.4 ciscoUnifiedFirewallMIB
cufwConnGlobalNumResDeclined.0 = Counter64: 0 Connections
cufwConnGlobalNumActive.0 = Gauge32: 168 Connections
cufwConnGlobalConnSetupRate1.0 = Gauge32: 2 Connections per second
cufwConnGlobalConnSetupRate5.0 = Gauge32: 0 Connections per second
cufwConnSetupRate1.udp = Gauge32: 1 Connections Per Second
cufwConnSetupRate1.tcp = Gauge32: 0 Connections Per Second
cufwConnSetupRate5.udp = Gauge32: 0 Connections Per Second
cufwConnSetupRate5.tcp = Gauge32: 0 Connections Per Second
cufwUrlfRequestsNumProcessed.0 = Counter64: 0 Requests
cufwUrlfRequestsProcRate1.0 = Gauge32: 0 Requests per second
cufwUrlfRequestsProcRate5.0 = Gauge32: 0 Requests per second
cufwUrlfRequestsNumAllowed.0 = Counter64: 0 Requests
cufwUrlfRequestsNumDenied.0 = Counter64: 0 Requests
cufwUrlfRequestsDeniedRate1.0 = Gauge32: 0 Requests per second
cufwUrlfRequestsDeniedRate5.0 = Gauge32: 0 Requests Per Second
cufwUrlfRequestsNumCacheAllowed.0 = Counter64: 0 Requests
cufwUrlfRequestsNumCacheDenied.0 = Counter64: 0 Requests
cufwUrlfRequestsNumResDropped.0 = Counter64: 0 Requests
cufwUrlfRequestsResDropRate1.0 = Gauge32: 0 Requests Per Second
cufwUrlfRequestsResDropRate5.0 = Gauge32: 0 Requests Per Second
cufwUrlfNumServerTimeouts.0 = Counter64: 0
cufwUrlfNumServerRetries.0 = Counter64: 0
paris@bethlehem[1]:~$

That does not mean that another MIB cannot provide the information we are looking for. However, the “sh snmp-server oidlist” command doesn’t show any promising OIDs so it seems like we are out of luck.

Useful References

https://supportforums.cisco.com/document/7336/snmp-mibs-and-traps-asa-additional-information

More GNOME/Ubuntu Unity System-wide Defaults

In this post we discussed how to set up system-wide defaults using GSettings schema overrides. This works great but we recently ran into a situation where this was not possible because the schema we wanted to modify was “relocatable”. Trying to modify such a schema without specifying a DConf path results in the following error:

$ gsettings set org.compiz.opengl sync-to-vblank true
Schema 'org.compiz.opengl' is relocatable (path must be specified)

The correct way to change a relocatable schema is by appending the path, as the error message above states. For example:

$ gsettings get org.compiz.opengl:/apps/compiz-1/plugins/opengl/screen0/options/sync_to_vblank/ sync-to-vblank
true

(Note the “:/apps/compiz-1/plugins/opengl/screen0/options/sync_to_vblank/ after the schema name; this is the path to the preference.)

The problem with this approach is that either by design or because it is a bug, it is not possible to write a schema override file that includes a DConf path. This Ubuntu bug seems to imply that this is a bug.

Another way to accomplish a system-wide default is by going to a lower level than GSettings and configuring DConf directly. It is probably better to use GSettings but in this particular case we had no option.

Here’s what we did:

First, we created the file /etc/dconf/profile/user with the following contents:

user-db:user
system-db:system-wide

Next, we created the directory /etc/dconf/db/system-wide.d and the file /etc/dconf/db/system-wide.d/00_compiz_site_settings with the following contents:

[org/compiz/profiles/unity/plugins/opengl]
enable-x11-sync=false

We then ran the command “dconf update” (as root) which created the DConf database /etc/dconf/db/system-wide (a binary file).

This causes the “opengl” Compiz plugin preference “enable-x11-sync” to be set to “false” for all users in the system.

References

This blog post from Ross Burton has a good discussion on how to set system-wide settings using GSettings: http://www.burtonini.com/blog/computers/gsettings-override-2011-07-04-15-45. It would have been a good reference to provide in my previous post but we missed it when we wrote that post.

The dconf System Administrator Guide is a fantastic reference to understand how to set system-wide defaults using DConf. One thing that was not clear to use after reading this document was that of DConf profile selection — the explanation above uses the file /etc/dconf/profiles/user because if no other DConf profile is selected (via the DCONF_PROFILE environment variable) then the profile called “user” is the one that is opened.

This post by Matt Fischer was extremely useful to understand how things work with DConf. Based on this post is that we realized we needed to use a profile called “user”.

Finally, this askubuntu.com question has very good insight into the differences between DConf and GSettings.

IPv6 Automatic Configuration

The Information Technology folks at the place I work enabled IPv6 a few months ago. Things worked great for a while but I recently noticed that I was not able to reach the IPv6 Internet. A quick investigation showed that IT disabled IPv6 Stateless Address Autoconfiguration (SLAAC) and enabled DHCPv6:

router>sh ipv6 interface vlan 320 
Vlan320 is up, line protocol is up
  IPv6 is enabled, link-local address is FE80::208:E3FF:FEFF:FD90 
  No Virtual link-local address(es):
  Description: data320
  Global unicast address(es):
    20xx:xxx:xxx:xxx::1, subnet is 20xx:xxx:xxx:xxx::/64 
  Joined group address(es):
    FF02::1
    FF02::2
    FF02::A
    FF02::D
    FF02::16
    FF02::FB
    FF02::1:2
    FF02::1:FF00:1
    FF02::1:FFFF:FD90
  MTU is 1500 bytes
  ICMP error messages limited to one every 100 milliseconds
  ICMP redirects are disabled
  ICMP unreachables are disabled
  Input features: Verify Unicast Reverse-Path
  Output features: MFIB Adjacency HW Shortcut Installation
  Post_Encap features: HW shortcut
 IPv6 verify source reachable-via any
   0 verification drop(s) (process), 0 (CEF)
   9 suppressed verification drop(s) (process), 9 (CEF)
  ND DAD is enabled, number of DAD attempts: 1
  ND reachable time is 30000 milliseconds (using 30000)
  ND advertised reachable time is 0 (unspecified)
  ND advertised retransmit interval is 0 (unspecified)
  ND router advertisements are sent every 200 seconds
  ND router advertisements live for 1800 seconds
  ND advertised default router preference is Medium
  Hosts use DHCP to obtain routable addresses.
router>

Note the “Hosts use DHCP to obtain routable addresses” message — it used to be “Hosts use stateless autoconfig for addresses”.

I am using NetworkManager on Ubuntu 14.10 to manage my network configuration. The version of NetworkManager on Ubuntu 14.10 is 0.9.8.8-0ubuntu28. The IPv6 configuration methods available for NetworkManager can be seen in the following screenshot:

When SLAAC was enabled, I had my network interface configured using the “Automatic” IPv6 configuration method. After IT switched to DHCPv6 this setting prevented my computer from getting an IPv6 address.

After switching to the “Automatic, DHCP only” method I was able to obtain an IPv6 address.

Unfortunately, it seems like the version of NetworkManager in Ubuntu 14.10 has a bug that prevents the installation of a default route (which is not obtained via DHCPv6 but via Neighbor Discovery Router Advertisement messages). The root cause of the bug seems to be that NetworkManager instructs the kernel to ignore Router Advertisement messages. It looks like this bug is fixed in NetworkManager versions 0.9.10.0 and later, but I decided to just live in an IPv4 at work instead of trying to backport the fix to NetworkManager 0.9.8, or trying to build NetworkManager 0.9.10.0 or later for Ubuntu 14.10.

Note: This blog post was helpful for me to understand what was happening: http://mor-pah.net/2012/11/06/cisco-ios-disabling-ipv6-stateless-autoconfig/.

Disable User Switching on Ubuntu 14.04

Recently, one of our home computers running Ubuntu 14.04 has been experiencing what seems to be a bug that is triggered when multiple users log in concurrently using the “fast user switching” feature. The symptom of the bug is a black screen after trying to switch back to an existing user session. Searching the Web seems to indicate that this is a common problem but it is not clear to me where (what component) the bug lies. This Ubuntu bug seems to match the problem but it has been attributed to a bug in the Xorg Intel graphics driver: .

In any case, my goal with this post is not to look into the bug itself but into a simple way to try to prevent it — because the bug is apparently triggered by switching users I decided to look into what it takes to disable the fast user switching feature:

In modern Ubuntu/GNOME (GNOME >= 3.0), fast user switching is a system-wide option that is controlled by a pair of GSettings options (they used to be GConf options but moved to GSettings when the GNOME project deprecated GConf in favor of GSettings):

shell$ gsettings list-recursively | grep user-switch
org.gnome.desktop.lockdown disable-user-switching false
org.gnome.desktop.screensaver user-switch-enabled true

These options are part of XML schema files stored under the /usr/share/glib-2.0/schemas/ directory:

shell$ grep user-switch /usr/share/glib-2.0/schemas/*xml
/usr/share/glib-2.0/schemas/org.gnome.desktop.lockdown.gschema.xml:    <key type="b" name="disable-user-switching">
/usr/share/glib-2.0/schemas/org.gnome.desktop.screensaver.gschema.xml:    <key type="b" name="user-switch-enabled">

To change the default, which is user switching enabled, one has to use the correct method to override GSettings defaults, which is to create a .gschema.override file, and re-compile the schemas.

To override the above two GSettings options I created /usr/share/glib-2.0/schemas/org.gnome.desktop.lockdown.gschema.override and /usr/share/glib-2.0/schemas/org.gnome.desktop.screensaver.gschema.override with the following contents:

shell$ cat /usr/share/glib-2.0/schemas/org.gnome.desktop.lockdown.gschema.override
[org.gnome.desktop.lockdown]
disable-user-switching=true

and

shell$ cat /usr/share/glib-2.0/schemas/org.gnome.desktop.screensaver.gschema.override
[org.gnome.desktop.screensaver]
user-switch-enabled=false

Then the schemas need to be re-compiled:

shell$ sudo glib-compile-schemas /usr/share/glib-2.0/schemas/

This refreshes the file /usr/share/glib-2.0/schemas/gschemas.compiled so the overridden GSettings that we configured are used. Logging out and restarting the lightdm service (sudo service lightdm restart) is required so the new configuration takes effect.

There is a wrinkle in all this, however — the session indicator (provided by the package indicator-session) in Ubuntu 14.04 (and probably some previous releases) does not take into consideration the above GSettings options so user switching is always available regardless of configuration. This is tracked in Ubuntu bug #1325353, which is fixed in Ubuntu 14.10. I did not want to upgrade my machine from 14.04 to 14.10 so I just downloaded the latest version of the indicator-session package (from what will become Ubuntu 15.04) and installed that (there were no package dependency problems).

I thought I would write about my experience disabling user switching because it requires overriding GSettings preferences via .gschema.override files and gschema recompiles, which is something I keep forgetting how to do.

As to whether disabling user switching fixes the black screen problem… only time will tell — users cannot use the computer while someone else is logged in. Instead, the user logged in must log out and then the new user has to log in via the LightDM greeter.

Note: The following  askubuntu.com question was very useful to figure out how to change GSettings defaults:

http://askubuntu.com/questions/65900/how-can-i-change-default-settings-for-new-users

ZoneMinder Hash Logins

ZoneMinder is a fantastic Linux video camera security and surveillance solution dosierung cialis. I have a ZoneMinder installation at home that I use to monitor a few IP-based video cameras.

My ZoneMinder installation uses the built-in authentication system, which means that only authenticated users can access the system.

One problem with using the built-in authentication system, however, is that it makes it hard to access video from the cameras from outside of ZoneMinder. For example, if I wanted to take a snapshot from a shell script of what one of the ZoneMinder cameras is currently recording, that would not be very easy to accomplish because the shell script would have to somehow log in first, establish a fake web browsing session (session cookie, etc.), and then finally request the snapshot.

Fortunately, ZoneMinder offers a way to accomplish this without too much hassle via a  feature called “hash logins”, which is enabled by setting the option ZM_AUTH_HASH_LOGINS (Options->System->ZM_AUTH_HASH_LOGINS).

The way to use this is by appending a ‘&auth=<login hash>’ parameter to the ZoneMinder URL one wants to access. For example, running the following command would retrieve a snapshot (in JPEG format) from the camera with monitor ID 8:

shell$ curl 'http://www.example.comt/cgi-bin/nph-zms?mode=single&monitor=8&auth=d8b45b3cf3b24407d09cbc16123f3549' -o /tmp/snapshot.jpg
 % Total    % Received % Xferd  Average Speed   Time    Time     Time  Current
 Dload  Upload   Total   Spent    Left  Speed
 100 22813  100 22813    0     0   9488      0  0:00:02  0:00:02 --:--:--  9485

The only complicated part here is knowing how to generate the hash used in the “auth” parameter. This does not seem to be documented anywhere, nor could I find any examples, but a quick read of the ZoneMinder code provided the necessary clues: The hash is calculated by the function getAuthUser() in the file includes/functions.php like this:

$time = localtime( $now );
$authKey = ZM_AUTH_HASH_SECRET.$user['Username'].$user['Password'].$remoteAddr.$time[2].$time[3].$time[4].$time[5];
$authHash = md5( $authKey );

ZM_AUTH_HASH_SECRET is a string chosen by the user via ZoneMinder options. $user[‘Username’] and $user[‘Password’] come from the ‘Users’ table in the ZoneMinder database — getAuthUser() will iterate over all existing users trying to find a match. $time contains the local time and $time[2], $time[3], $time[4], and $time[5] contain the current hour, day of the month, month and year, respectively. The code tries to find a match in the last two hours (in other words a login hash will found to be valid for up to two hours).

A simple test program to generate the hash looks like this:

#!/usr/bin/php
 <?php
 //
 // Needs ZM_OPT_USE_AUTH and ZM_AUTH_HASH_SECRET and ZM_AUTH_HASH_LOGINS.
 // Better not to use ZM_AUTH_HASH_IPS as this will break authentication
 // when client is behind NAT because the IP address of the client is used
 // to calculate the hash if ZM_AUTH_HASH_IPS is set.
 //
 $time = localtime();
 $authKey = 'mykey' . 'myuser' . '*0945FE11CAC14C0A4A72A01234DD00388DE250EC' . $time[2] . $time[3] . $time[4] . $time[5];
 echo "\$authKey = $authKey\n";
 $authHash = md5($authKey);
 echo "\$authHash = $authHash\n";
 ?>

Note that the hashed password for the user needs to be provided to the script (the user password is passed through the MySQL PASSWORD() function to finally obtain the password hash that is stored in the ZoneMinder database).

How to make practical use of all this? A script could generate the login hash and then access some part of ZoneMinder via an HTTP request. One could use this, for example, in a script run via cron every few minutes to take snapshots to produce a time-lapse video. This is left as an exercise for the reader.

Slow SSH logins/spun-down disk woken during SSH logins

For a while I have been troubleshooting why SSH logins into my Ubuntu server running 14.04 LTS are seemingly slow. I enabled SSH debugs (LogLevel set to DEBUG in /etc/ssh/{sshd_config,ssh_config}) on both the client and the server and did not find anything that pointed to an issue with the SSH negotiation/login itself. Recently I discovered that the 10-second delay in logging in had to do with SSH logins causing a hard disk that I keep spun down to be spun up. That takes about 10 seconds, which explains the delay.

Turns out that by default, console and SSH logins cause the scripts in /etc/update-motd.d/ to be executed. The script /etc/update-motd.d/98-fsck-at-reboot in particular is what causes disks to be spun up.

The scripts in /etc/update-motd-d/ are responsible for generating the file /run/motd.dynamic, which looks like this:

Welcome to Ubuntu 14.04.1 LTS (GNU/Linux 3.13.0-37-generic x86_64)

 * Documentation:  https://help.ubuntu.com/

  System information as of Thu Oct  9 10:05:21 EDT 2014

  System load:  0.37                Processes:           164
  Usage of /:   18.1% of 915.51GB   Users logged in:     1
  Memory usage: 55%                 IP address for eth0: 10.10.13.10
  Swap usage:   12%

  Graph this data and manage this system at:
    https://landscape.canonical.com/

That is pretty and provides some good information but for me I rather have a shell prompt immediately after I hit the <Enter> key after typing “ssh <my server>”. I then can manually execute some useful commands like “w” to see who is logged in, the uptime, etc.

I have disabled execution of the /etc/update-motd.d/ scripts by tweaking the files /etc/pam.d/{login,sshd} in the following way:

# Prints the message of the day upon succesful login.
# (Replaces the `MOTD_FILE' option in login.defs)
# This includes a dynamically generated part from /run/motd.dynamic
# and a static (admin-editable) part from /etc/motd.
#session    optional   pam_motd.so  motd=/run/motd.dynamic noupdate
#session    optional   pam_motd.so

# Disable display of /run/motd.dynamic and add "noupdate" so
# scripts in /etc/update-motd.d/* are not called.
# peloy@chapus.net
# 20141009
session    optional   pam_motd.so noupdate

The first two commented out “session” lines are what were there by default. I commented them out and then added a new “session” line that has the “noupdate” keyword, which is actually what causes the pam_motd.so module to not execute the scripts in /etc/update-motd.d/. This uncommented “session” line is what will display the standard /etc/motd file (if it exists).

Now a SSH login is fast, does not provide a lot of information upon log in (which I like), and, most important, spun down disks are not spun up upon log in:

$ ssh altamira
You have new mail.
Last login: Thu Oct  9 10:23:44 2014 from 2003:450:e6a5:100:a412:6z7a:897d:1387
altamira$ # That was a very fast login!

The following askubuntu.com question is what pointed me in the right direction:

http://askubuntu.com/questions/282245/ssh-login-wakes-spun-down-storage-drives

This is an issue that seems to have been introduced when I upgraded this server from Ubuntu 12.04 LTS to 14.04LTS. In particular, my Ubuntu 12.04LTS installation did not have the file /etc/update-motd.d/98-fsck-at-reboot.

Buffer Overflow in Embedded Microcontroller. Ouch.

We have been chasing down a mysterious problem in a embedded application we are developing. It is a sprinkler timer to water our yard. The microcontroller is an ATmega AVR 328p, the same microcontroller that some of the Arduino platforms use.

The application has an RFM12B wireless transceiver from Hope RF, and we are using this RFM12 library: http://www.das-labor.org/wiki/RFM12_library/en.

The issue is that the application works fine for days, sending and receiving data through the RFM12B wireless transceiver, but all of the sudden, it would stop working. Resetting the device restores operation.

The device is outside, in our yard, right next to a garden bib. It is not easy to troubleshoot this problem because all connectivity that we have to the device is via the RFM12B transceiver, so if it the wireless subsystem of the application is hosed, then there really is nothing we can do to troubleshoot. In addition, the wireless command set in in the firmware is currently very limited so we do not have good debugging tools even if the wireless subsystem is up. The firmware does send debugging information through a serial port on the microcontroller, though, so we have to use that in absence of other debugging tools.

The first step we took to debug the issue was to provide remote access to the microcontroller’s serial port. For this, we used a Raspberry Pi with an USB-to-serial adapter and with a WiFi USB adapter. We then left minicom (a serial communication program for Linux) running and came back every once in while, via remote SSH session, to check. Today we found an occurrence of the issue and investigated. This is what we found:

First, we noticed that the wireless subsystem was not working when we saw the following messages on the device’s console:

[2014-08-06 17:26:53] rfm12_tx() error 3
[2014-08-06 17:26:58] rfm12_tx() error 3
[2014-08-06 17:27:03] rfm12_tx() error 3
[2014-08-06 17:27:08] rfm12_tx() error 3

We then ran a diagnostic command on the console:

# show rfm12
[2014-08-06 17:29:11] My RFM12 node ID: 111.
[2014-08-06 17:29:11] RFM12 status register: 0x023f.
[2014-08-06 17:29:11] RFM12 state = 0
[2014-08-06 17:29:11] RFM12 tx state = 162
[2014-08-06 17:29:11] Number of bytes to transmit or receive = 219
[2014-08-06 17:29:11] Current byte count = 1
[2014-08-06 17:29:11] Total tx bytes = 40622
[2014-08-06 17:29:11] Total errors = 29983

A few things caught our attention:

  1. The RFM12 node ID should be 12 but the output says that it is 111.
  2. There is no such thing as RFM12 tx state 162 in the RFM12 library; it goes up to 3 or 4.
  3. The command prompt should be “frontlawn# “, but it is just “# “.

Obviously, some bad memory corruption has taken place here. Let’s see what we find…

The other piece of information we found in the minicom history buffer was this:

[2014-08-06 14:36:29] frontlawn# RFM12 rx packet: flags AD., hdr = 0x6c, len = 13.                                                
[2014-08-06 14:37:46] 00000000  3445 7365 7420 7661 6c20 6f20 33        4Eset val o 3                                             
[2014-08-06 14:37:46]                                                                                                             
[2014-08-06 14:38:27] RFM12 rx packet: flags AD., hdr = 0x6c, len = 14.                                                           
[2014-08-06 14:38:27] 00000000  3446 7365 7420 7661 6c20 636c 2033      4Fset val cl 3                                            
[2014-08-06 14:38:27]                                                                                                             
[2014-08-06 15:07:10] RFM12 rx packet: flags ..., hdr = 0x0f, len = 254.                                                          
[2014-08-06 15:07:11] 00000000  3445 7365 7420 7661 6c20 6f20 336e 2033 4Eset val o 3n 3                                          
[2014-08-06 15:07:11] 00000010  ffff ffff 3337 fd7f fc0f fd1c 201e 07ff ....37...... ...                                          
[2014-08-06 15:07:11] 00000020  07fb 03df 407c 741f 2dd4 040c f721 a302 ....@|t.-....!..                                          
[2014-08-06 15:07:11] 00000030  3529 0b05 080e 0200 0000 0000 0000 0000 5)..............                                          
[2014-08-06 15:07:11] 00000040  0000 0000 0000 0000 0000 0000 0000 0000 ................                                          
[2014-08-06 15:07:11] 00000050  0000 0000 0000 0000 0000 0100 0000 008a ................                                          
[2014-08-06 15:07:11] 00000060  e955 ae3c b9e0 c7f0 6f10 179c bd65 625f .U.<....o....eb_                                          
[2014-08-06 15:07:11] 00000070  3aea 998e 925c 1f43 152b 6b49 5e0b cca2 :....\.C.+kI^...                                          
[2014-08-06 15:07:11] 00000080  cdd5 313e ae9e 1f75 9a3d 1eea d964 bfee ..1>...u.=...d..                                          
[2014-08-06 15:07:11] 00000090  bffe 96dc 5df9 6b2c fdb7 8dd5 daab b8aa ....].k,........                                          
[2014-08-06 15:07:11] 000000a0  8fc5 6e42 8df9 9e7b 53bf 3cf6 fd19 7737 ..nB...{S.<...w7                                          
[2014-08-06 15:07:11] 000000b0  2767 f67c 975b 8f5a a7ea 6e63 bd39 2258 'g.|.[.Z..nc.9"X                                          
[2014-08-06 15:07:11] 000000c0  756e a1bf 80fd 4b56 f0e3 e7fb bb28 ef93 un....KV.....(..                                          
[2014-08-06 15:07:11] 000000d0  e353 2308 50fe 49f6 7b4f 2300 b087 f1fa .S#.P.I.{O#.....                                          
[2014-08-06 15:07:12] 000000e0  9581 ff47 aba7 75a2 c0eb 91fa 6b7a 80e3 ...G..u.. cialis 20mg apotheke...kz..                                          
[2014-08-06 15:07:12] 000000f0  52e0 93c0 da66 bdfb 279b 8a07 af12      R....f..'.....                                            
[2014-08-06 15:07:12]                                                                                                             
[2014-08-06 15:07:12] Invalid valve number.                                                                                       
[2014-08-06 15:07:12] rfm12_tx() error 3                                                                                          
[2014-08-06 15:07:17] rfm12_tx() error 3

At 14:36:29 the controller received the command “set val o 3” (short for “set valve open 3”, which instructs the controller to open valve number 3).

At 14:38:27 the controller received the command “set val cl 3” (short for “set valve close 3”, which instructs the controller to close valve number 3).

We sent these commands and everything was good until this point.

However, at 15:07:10, we receive a giant packet of 254 bytes. That is the first sign of trouble — we only have 2048 bytes of RAM in an ATmega 328p microcontroller, so we have never configured such a large receive buffer in our application. We check the library source code and see that the size of the receive buffer is configurable and we have configured it to be 40 bytes.

Is it possible that the RFM12 library is buggy and is accepting such a large packet and storing it in a 40-byte buffer? No, we checked and it has the correct validations. This points to an issue in our code…

This is our code:

        if (rfm12_rx_status() == STATUS_COMPLETE) {
            pkt_hdr.__hdr_val = rfm12_rx_type();
            pkt_len = rfm12_rx_len();
            pkt_data = rfm12_rx_buffer();
            [...]
            if (pkt_len == 0)
                goto pkt_processed;

            /*
             * Action to take on received packet depends on the payload
             * type, which is the first byte of the payload.
             */
            if (pkt_data[0] == RFM12_PAYLOAD_CLICMD) {
                memcpy(cli_cmdbuf, pkt_data + 2, pkt_len - 2);
                cli_cmdbuf[pkt_len - 2] = '\0';
                cli_processcommand(cli_cmdbuf);
                [...]

The first byte of the packet (pkt_data[0]) is 0x34, according to the packet dump above. 0x34 happens to be RFM12_PAYLOAD_CLICMD, so the condition of the “if ()” statement is true and we take that code path. The first instruction in that code path is a memcpy() that will copy pkt_len – 2 bytes, i.e. 254 – 2 = 252 bytes into the array cli_cmdbuf[].

cli_cmdbuf[] is a global variable declared as:

/* A command cannot be longer that this many characters. */
#define CLI_MAX_CMDLEN 80

char cli_cmdbuf[CLI_MAX_CMDLEN];

Ouch! Yes, our buffer has been overflowed with this memcpy(). By 252 – 80 = 172 bytes! This explains the memory corruption and the failure of the wireless subsystem of the application.

A couple of observations about this whole issue:

  1. The received packet that caused the entire problem should not have been received. We have no idea who sent it, or why it is so large, but the fact of the matter is that we received it. Yes, it obviously is bogus, but we cannot allow a stray packet to bring us down like that. The lesson re-learned here is that our application needs to be able to handle exceptional conditions such as this.
  2. Of course, we were not aware of such exceptional condition before. Otherwise we would have put a check in place to prevent the disastrous memcpy(). The main problem here is that we were acting under the assumption that the low level RFM12 driver would not pass to us a packet that has a received, advertised length that is larger than the configured size of the receive buffer — the low level driver checks for the available space in the receive buffer and does not store more data if there is no more space left. However, it notifies the application that there is a packet ready to be handled, even if that packet is incomplete because it did not fit in the receive buffer. We guess this behavior is debatable because the application might want to consume that packet even if it is not complete (for example, do some error handling, print a debug message, etc.).
  3. In the world of embedded applications, the importance of debugging using a serial port cannot be overstated — we would have had a very hard time to find this issue if we had not seen the packet dump of that 254-byte packet on the serial console.

In terms of addressing the issue — we are going to try to address the problem by checking in our application that the size of the received advertised length of the packet is less than the size of the receive buffer. If the size is larger then we will ignore the packet. We will see how this plays out…