We recently had to configure a site-to-site IPsec-based VPN connection between AWS and a small router running OpenWrt 19.07. This post goes over the details so we remember what we did next time we have to do this…
OpenWrt
On the OpenWrt side, what is used is strongSwan. We tried to use as much OpenWrt “configuration flavor” as possible thinking that if we follow the way things are configured in OpenWrt future upgrades might be easier as configuration would not get lost.
To start, on OpenWrt we installed the following packages using opkg:
- kmod-ip-vti
- strongswan-minimal
- vti
- vti4
We then added the following to /etc/ipsec.conf (AWS makes it easy by providing this as a template, which you can download from AWS VPC service -> VPN -> Site-to-Site VPN Connections):
conn AWS-Tunnel1
auto=start
left=%defaultroute
leftid=65.x.x.x
right=18.x.x.x
type=tunnel
leftauth=psk
rightauth=psk
keyexchange=ikev2
ike=aes128-sha1-modp1024
ikelifetime=8h
esp=aes128-sha1-modp1024
lifetime=1h
keyingtries=%forever
leftsubnet=0.0.0.0/0
rightsubnet=0.0.0.0/0
dpddelay=10s
dpdtimeout=30s
dpdaction=restart
## Please note the following line assumes you only have two tunnels
## in your Strongswan configuration file. This "mark" value must be
## unique and may need to be changed based on other entries in your
## configuration file.
mark=100

conn AWS-Tunnel2
auto=start
left=%defaultroute
leftid=65.x.x.x
right=19.x.x.x
type=tunnel
leftauth=psk
rightauth=psk
keyexchange=ikev2
ike=aes128-sha1-modp1024
ikelifetime=8h
esp=aes128-sha1-modp1024
lifetime=1h
keyingtries=%forever
leftsubnet=0.0.0.0/0
rightsubnet=0.0.0.0/0
dpddelay=10s
dpdtimeout=30s
dpdaction=restart
## Please note the following line assumes you only have two tunnels in your Strongswan configuration file. This "mark" value must be unique and may need to be changed based on other entries in your configuration file.
mark=200
The following was added to /etc/ipsec.secrets:
65.x.x.x 18.x.x.x : PSK "PSK1 goes here"
65.x.x.x 19.x.x.x : PSK "PSK2 goes here"
The following was added to /etc/config/network (this creates the VTI interfaces on Linux):
config interface 'vti1'
option proto 'vti'
option mtu '1500'
option tunlink 'wan'
option peeraddr '18.x.x.x'
option zone 'vpn'
option ikey '100'
option okey '100'

config interface 'vti1_static'
option proto 'static'
option ifname '@vti1'
list ipaddr '169.254.132.86/30'

config interface 'vti2'
option proto 'vti'
option mtu '1500'
option tunlink 'wan'
option peeraddr '19.x.x.x'
option zone 'vpn'
option ikey '200'
option okey '200'

config interface 'vti2_static'
option proto 'static'
option ifname '@vti2'
list ipaddr '169.254.133.142/30'

config route
option target '10.0.0.0/8'
option interface 'vti1_static'

config route
option target '10.0.0.0/8'
option metric '10'
option interface 'vti2_static'
(The IP addresses under the vtiX_static interfaces are for the point-to-point link. AWS provides those.)
AWS
Step 1: Log into your AWS account and go to Services -> VPC
Step 2: Under “Virtual Private Network (VPN)”, go to “Customer Gateways” and create a new customer gateway. We chose “static” routing for this example.
One can attach a site-to-site connection to a Virtual Private Gateway, or to a Transit Gateway. Because our AWS infrastructure had a Transit Gateway we chose to attach the new site-to-site VPN connection to it, so we did not have to create a Virtual Private Gateway.
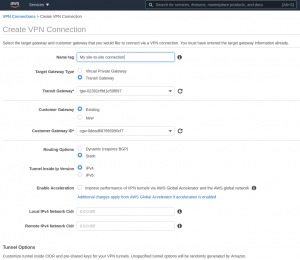
Step 3: Go to “Virtual Private Network (VPN)” -> “Site-to-Site VPN Connections” and create your site-to-site VPN connection.
Note local and remote IPv4 network CIDRs — they are empty, which means 0.0.0.0/0. That is what we want and it means that we will send through the VPN tunnel whatever needs to be sent based on routing tables. This type of VPN is called “route-based” VPN, and contrasts with “policy-based” VPN.
Note also that from “Virtual Private Network (VPN)” -> “Site-to-Site VPN Connections” is where you can download IPsec configuration tempates for VPN gateways from different vendors. In our case, because our VPN gateway is a router running strongSwan-based IPsec running on OpenWrt, we chose “Strongswan”, as shown in the following screenshot:
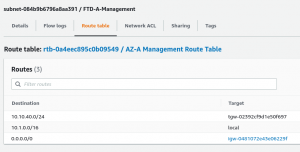
Step 4: Every subnet in your AWS VPC that needs to reach your remote site must have in its route table a route to your remote subnet that points to your Transit Gateway. To (in our case, statically) configure this, go to “Virtual Private Cloud” -> “Subnets”, select the subnet that needs to reach your remote network, edit, and add a static route. For example:
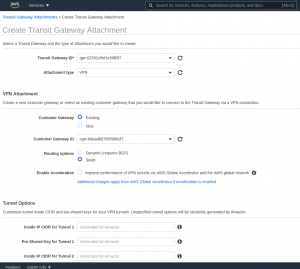
Step 5: Create a Transit Gateway Attachment in “Transit Gateways” -> “Transit Gateway Attachments”. This links your Transit Gateway and your Customer Gateway.
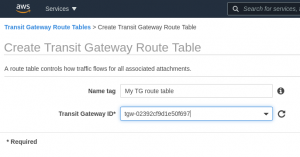
Step 6: Finally, create a route table for your Transit Gateway in “Transit Gateways” -> “Transit Gateway Route Tables”. Only the Transit Gateway needs to be specified:
Edit the Transit Gateway route table that you just created and create an association to the the attachment you created in step #5:
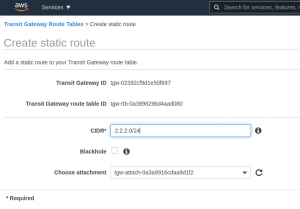
Create a new static route in the Transit Gateway route table that you just created and that uses your VPN attachment:
That should be it — after all this your VPN tunnels should come up.
Monitoring
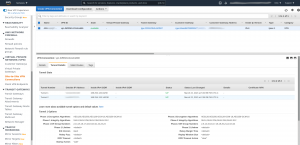
In AWS, you will see the status of your tunnels in VPC -> Virtual Private Network (VPN) -> Site-to-Site VPN Connections -> select your VPN site-to-site connection -> “Tunnel Details” tab. For example:
In OpenWrt you can use the command “ipsec statusall” to get details about the tunnels. For example:
root@Shangri-La:~# ipsec statusall
Status of IKE charon daemon (strongSwan 5.8.2, Linux 4.14.221, mips):
uptime: 7 days, since Mar 22 14:57:27 2021
worker threads: 11 of 16 idle, 5/0/0/0 working, job queue: 0/0/0/0, scheduled: 6
loaded plugins: charon aes sha1 random nonce x509 pubkey gmp xcbc hmac kernel-netlink socket-default stroke updown
Listening IP addresses:
10.10.10.1
65.x.x.x.x
[...]
Connections:
AWS-Tunnel1: %any...18.x.x.x IKEv2, dpddelay=10s
AWS-Tunnel1: local: [65.x.x.x] uses pre-shared key authentication
AWS-Tunnel1: remote: [19.x.x.x] uses pre-shared key authentication
AWS-Tunnel1: child: 0.0.0.0/0 === 0.0.0.0/0 TUNNEL, dpdaction=restart
AWS-Tunnel2: %any...18.x.x.x IKEv2, dpddelay=10s
AWS-Tunnel2: local: [65.x.x.x] uses pre-shared key authentication
AWS-Tunnel2: remote: [19.x.x.x] uses pre-shared key authentication
AWS-Tunnel2: child: 0.0.0.0/0 === 0.0.0.0/0 TUNNEL, dpdaction=restart
Security Associations (2 up, 0 connecting):
AWS-Tunnel1[47]: ESTABLISHED 65 minutes ago, 65.x.x.x[65.x.x.x]...18.x.x.x[18.x.x.x]
AWS-Tunnel1[47]: IKEv2 SPIs: b0a6f8cf2d2a7bf3_i* 8477683795cbfc06_r, pre-shared key reauthentication in 6 hours
AWS-Tunnel1[47]: IKE proposal: AES_CBC_128/HMAC_SHA1_96/PRF_HMAC_SHA1/MODP_1024
AWS-Tunnel1{495}: INSTALLED, TUNNEL, reqid 47, ESP in UDP SPIs: ce15ae7e_i c004506d_o
AWS-Tunnel1{495}: AES_CBC_128/HMAC_SHA1_96/MODP_1024, 0 bytes_i, 0 bytes_o, rekeying in 24 minutes
AWS-Tunnel1{495}: 0.0.0.0/0 === 0.0.0.0/0
AWS-Tunnel2[46]: ESTABLISHED 4 hours ago, 65.x.x.x[65.x.x.x]...19.x.x.x[19.x.x.x]
AWS-Tunnel2[46]: IKEv2 SPIs: 3d8bdfddb170a01e_i* ebd2e1b67befb4e2_r, pre-shared key reauthentication in 3 hours
AWS-Tunnel2[46]: IKE proposal: AES_CBC_128/HMAC_SHA1_96/PRF_HMAC_SHA1/MODP_1024
AWS-Tunnel2{494}: INSTALLED, TUNNEL, reqid 46, ESP in UDP SPIs: c9df3c20_i c58ec754_o
AWS-Tunnel2{494}: AES_CBC_128/HMAC_SHA1_96/MODP_1024, 549898 bytes_i (4342 pkts, 3s ago), 425444 bytes_o (4300 pkts, 3s ago), rekeying in 16 minutes
AWS-Tunnel2{494}: 0.0.0.0/0 === 0.0.0.0/0
root@Shangri-La:~#
References
IPsec Site-to-Site (“https://openwrt.org/docs/guide-user/services/vpn/strongswan/site2site”)
strongSwan IPsec Configuration via UCI (“https://openwrt.org/docs/guide-user/services/vpn/strongswan/configuration”)
Tunneling interface protocols (“https://openwrt.org/docs/guide-user/network/tunneling_interface_protocols”)
“How To Establish IPsec Site To Site VPN Tunnel Via VTI. | Linux | OpenWrt” by Geeky Sagar (https://www.youtube.com/watch?v=HDqAl_PozCU)


